favourite tote bag
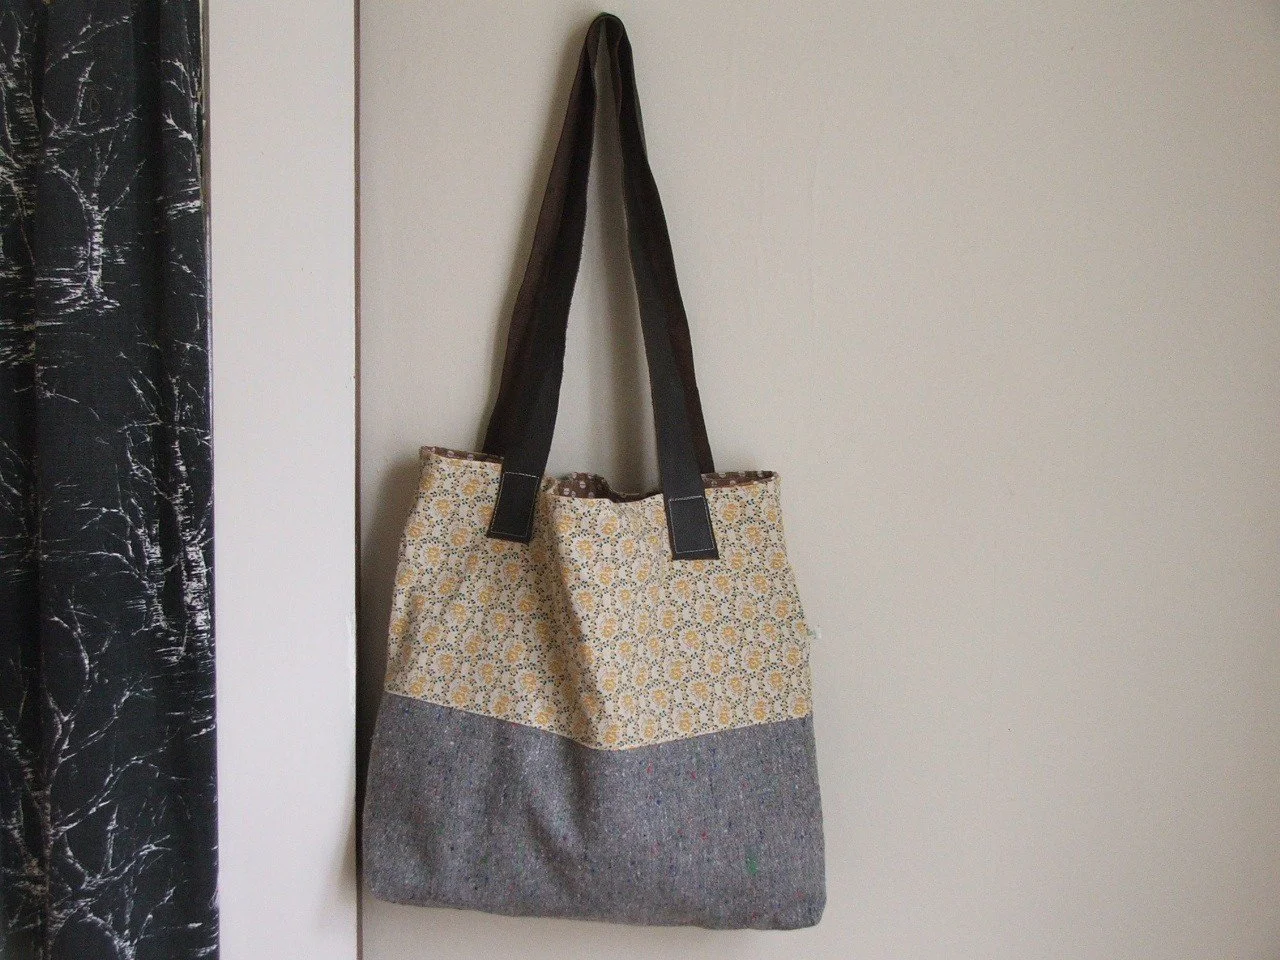
Here is my favourite way to make a tote bag. It’s a great way to repurpose fabric.
The design allows you to showcase your favourite small-ish pieces of fabric and have fun coordinating with other pieces you might have lying around. As always, I like to get creative and recycle textiles: the bag above is made from hand-printed Indian cotton (the yellow), recycled wool fabric from an old coat (the grey), fine cotton lining (from a vintage bed sheet) with recycled leather handles.
Of course, you could use any woven fabric you like. My tip is to use something sturdier for the bottom panel (for strength, and because it gets knocked around more) and something lightweight for the lining.
Variations
Add a pocket to the lining, before sewing the bag together.
You could make the bag outer from one single fabric, rather than panels of complementary fabric.
Make the straps from fabric instead, and insert them in at step 4 (just leave the strap ends poking out at the top before sewing the top seam), or perhaps you could use cotton twill tape or webbing.
If you use very sturdy fabric for your bag outer, you can skip the interfacing.
You can change the dimensions to make different sorts of bags. Another size I like is the ‘big beach bag’ for trips to the sea. I cut 2 panels for the front measuring 40cms square, side panels which measure 40cms x 10cms, and leather handles measuring 66cms long and 5cms wide.
Materials:
Small amounts of your favourite vintage fabrics- I use 2 different pieces for the bag outer
Lightweight cotton for lining
Piece of recycled leather (or you could use an old belt)- 2 strips measuring about 27” long
Iron-on interfacing
Sewing machine, pins, scissors, thread, iron, paper and pencil
Make your paper pattern:
Using pencil and paper, make up your pattern for ease of fabric cutting, and so that you can more bags quickly later.
With a ruler, draw a pattern for the top bag panel that measures 43 cms wide and 21 cms tall. Slightly taper in the side edges so that the top panel edge measures 40cms wide.
Make the bottom panel pattern by drawing a rectangle measuring 43cms wide (along the top), 21cms tall and 45cms along the bottom edge (the sides will slightly taper inwards like they did with the top panel.)
To make an optional patch pocket pattern (to be sewn onto the lining), draw a rectangle measuring 10cms tall X 15cms across.
Cutting:
Make sure your fabric is washed and ironed. Using the top panel pattern, cut out 2 pieces from your first choice of bag fabric. Using the other bag fabric, cut out 2 bottom panels. You will cut out your lining pieces after you have constructed the bag outer.
Construction:
1. Take one upper panel and one bottom panel. Match up the edges that are the same width, and with right sides facing, sew these panels together. Press seam towards the top of the bag and topstitch to hold it in place. Repeat with the other two panels.
2. Lay your finished bag outers onto the interfacing and cut around them. Apply interfacing to the wrong side of both pieces. With right sides facing, sew along the bottom and sides of the 2 bag pieces, taking care to match up the panel seams.
3. Fold lining fabric in half, right sides together. Lay the finished bag outer, turned inside out, over your lining fabric and cut around it, to create your lining pieces. Sew these together down the sides and along the base.
4. Pinch out a small corner in the outer bag base, so you have a flat triangle. Sew across this seam to give your bag some depth. Trim excess. Repeat with other base corner, and the two lining base corners.
5. Ensure that your bag outer is right-side out. Turn the bag lining inside-out. Place the bag outer inside the lining and pin all around the top edges, making sure that the side seams match. Leave a small gap of about 10cms and mark your gap with pins. Stitch around this top seam and turn the bag inside out through the gap you left.
6. Press finished bag well. Position your leather straps where you’d like them to sit and pin or tape them into place. Carefully stitch a square with a cross in the middle of it where your leather straps meet the top of the bag. You will have to use a sharp machine needle and slow stitches to do so. Trim all loose threads.
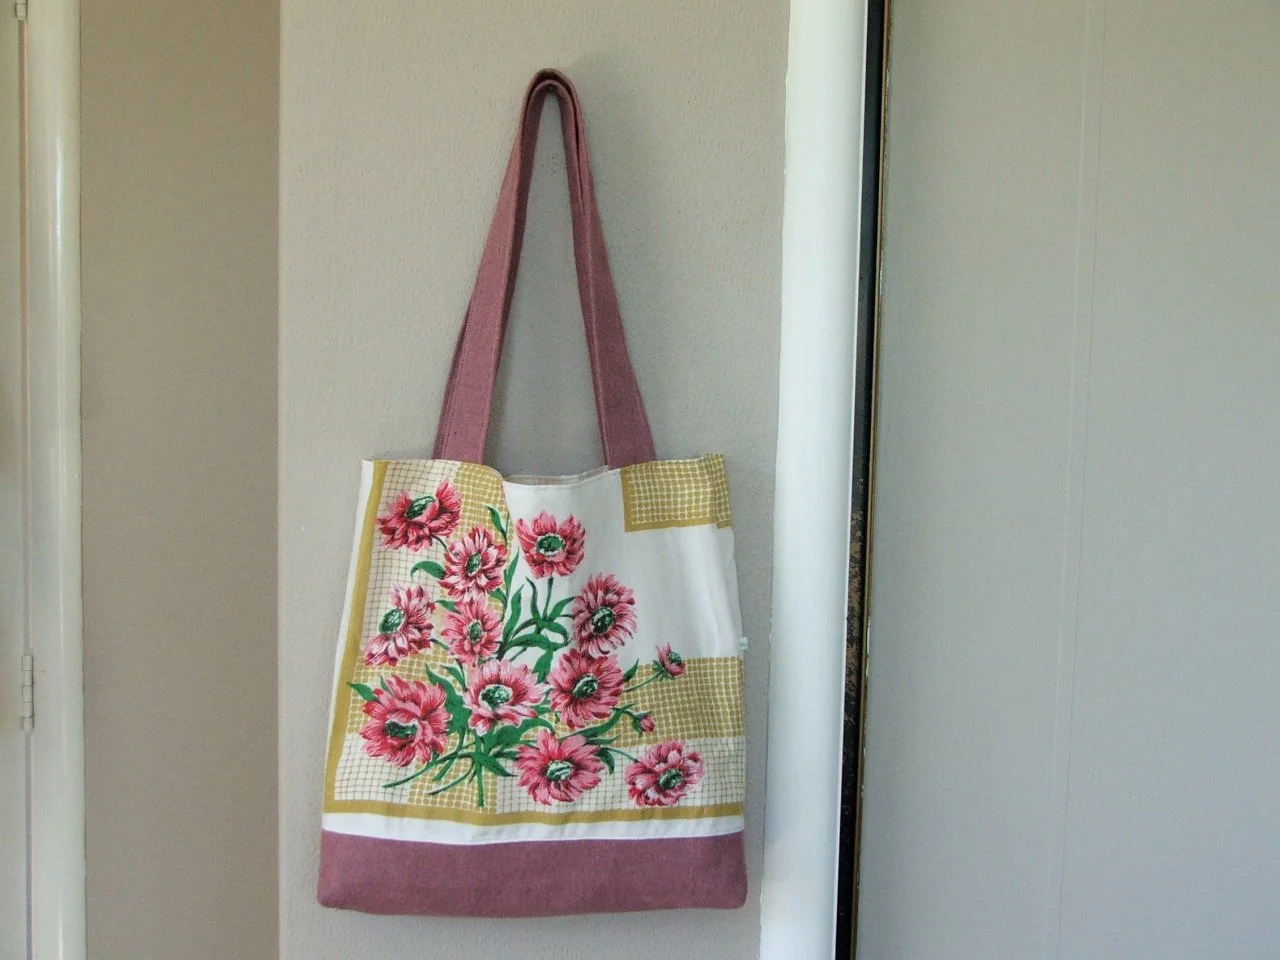
Here's another version of this bag.
For this one, I adjusted the panel dimensions to fit the fabric I wanted to use - a vintage tablecloth + wool fabric in a rosy pink shade.